Last Minute Valentine's Gift Using Print and Cut With Cricut Maker!
- Cristina de la Cruz

- Feb 10, 2020
- 2 min read
Updated: Mar 9, 2020
Valentine's Day is just around the corner! 4 more days, not counting today! This blog post would not be possible without the design from Brin (@brinnykdesign). Brin created these super cute Valentine's Day straw cards! Aren't they adorable!?
This is the PERFECT gift for kids and teachers at schools! The file is in JPEG format - so you are able to upload it to your Cricut or electronic cutting machine and have it cut for you. You do not need an electronic cutting machine to do this. If you are not planning on using an electronic cutting machine, make sure you have a paper trimmer or scissors.
If you are using your Cricut machine, follow the instructions below:
1. Upload the design to Cricut Design Space, Click on Upload Image
2. Once you have the design uploaded, you'll see it on your screen. Select the background and click once, you will see that you removed the white background and is left with the cards and the wording at the bottom.
3. To remove the words at the bottom, click on erase and start erasing.
4. Next, you will want to save the design as a Print Then Cut image. Do not save it as a Cut image, otherwise, you will not be able to send it to your printer directly from Design Space.
5. Once you've completed all the steps above, you'll see the design in your "Recently uploaded images" Click on it and you'll see it appear on your canvas in Design Space
6. Previously in one of steps above, we removed the wording at the bottom of the design. I used the "slice" tool in design space to remove that part from the actual design.
8. Now, you will have to size the design so you are able to send it to your printer! For the size, the width will be set to 7.271 and the height set it to 6.411!
9. Finally, it's time to send it to the printer! I am using my Canon laser printer. Make sure to turn off the bleed setting. Bleed "extends ink slightly beyond border of image to eliminate a white margin once the image is cut."
10. Design has been printed!

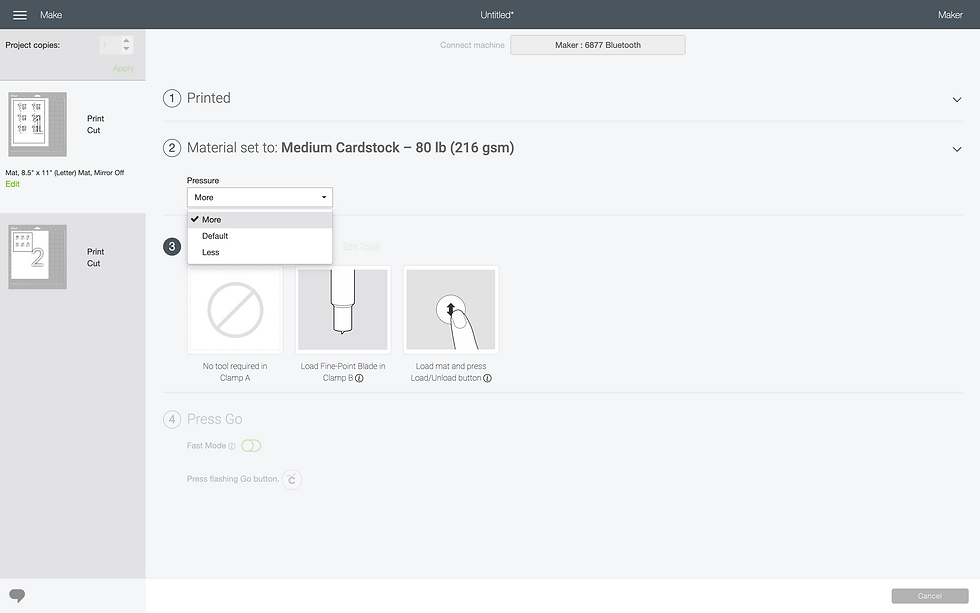
11. Now, it's time for your Cricut machine to cut the cardstock. Set Material to Medium Cardstock - 80lb (216 gsm)

Click on pressure and select More (I am so used to selecting more pressure on all my projects, you can try default and see how it works for you!)

Place cardstock on mat. I am using the StrongGrip mat however, I strongly recommend using the StandardGrip mat. I will be making a run to my nearest Joanns to purchase more StandardGrip mats!


ASSEMBLY
So now all you have to do is assemble which is super easy! You will need TWO items to complete this fun project!
Use your hole puncher to add holes (two holes) to the card for the straw to pass through.

Just like this!

Put the straw through the holes. Ta da!

Now you have all these pretty straws!

If you use the straw card design, tag @brinnykdesign and @modernflowercreation
on social media!
Huge THANK YOU to Brin from @brinnykdesign! She has a mini tutorial on IG so make sure to follow her!
Stay Crafty, Cristina


Comments