
HOW TO USE THE NEW CRICUT FOIL TRANSFER TOOL
- Cristina de la Cruz

- Sep 25, 2020
- 3 min read
This is a sponsored post written by me on behalf of Cricut. All opinions are 100% mine.
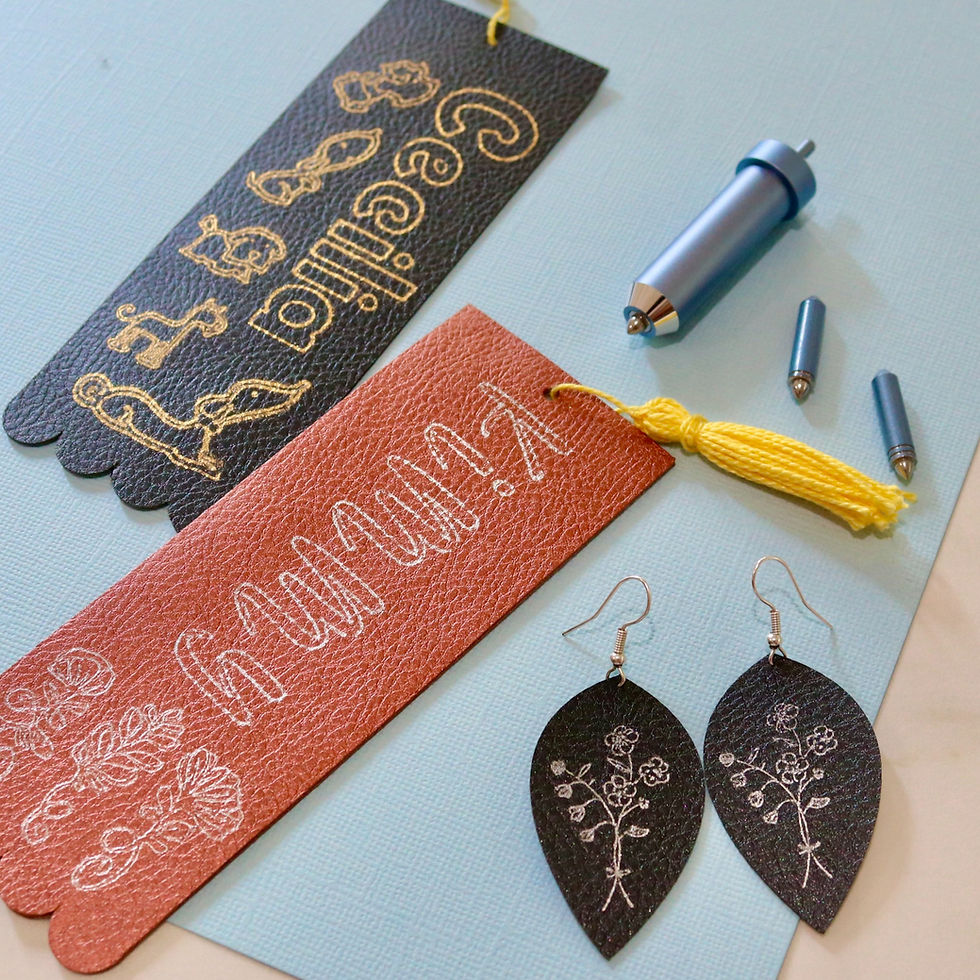
The news is out! The Cricut Foil Transfer Tool has finally been released and I am so excited to share two super easy projects that you can do utilizing the new foil transfer tool!
Before starting the tutorial, I want to thank Cricut for allowing me to try out the new foil transfer tool kit!
So, what exactly is the foil transfer tool? The foil transfer tool allows you add foil to your projects. You can use a variety of mediums such as cardstock and faux leather! The foil transfer tool has been precisely designed for the Explore Air and Cricut Maker machines. It is not compatible with the Cricut Joy. My favorite part of the foil transfer tool is the interchangeable tips: Fine, Medium and Bold. Depending on your project, you are able to decide what foil linetype you would like to use!
How exactly does the foil transfer sheet get on your material? The foil transfer tool is pressure activated whereas other foil tools on the market are heat activated. With that, it's time to get crafting!
BOOKMARK TUTORIAL
1. Open Cricut Design Space and start creating! I created a bookmark by cutting and welding shapes together. Then, I added text and images of dogs from design space. I changed the linetype to Foil which is the last option (see picture below). Once you select Foil, you will have three tips to choose from; Fine, Medium and Bold. You can use two different tips in the same projects as well as different color foil transfer sheets. Notice how the outline of the three dogs below the blue dog have a thinner outline - that's because the Fine tip will be used for these three dogs. The text "Cecilia" and the bigger dog at the bottom of the bookmark has thicker lines and that is because the bold tip will be used. Once you have selected your settings for foil, you will then need to attach both the bookmark and the foil images and text.

2. Place faux leather on a StandardGrip Mat. Then place the foil transfer sheet on top of the faux leather. Use the tape to make sure the foil transfer sheet does not move. Notice the placement of the faux leather on the StandardGrip Mat. I leave about half an inch from the top and half an inch from the left side of the mat. The reason for this spacing is so the rollers from the machine do not damage the foil transfer sheet. To avoid this, I recommend sliding your rollers all the way to the right of the machine.


3. Select "Faux Leather (Paper Thin) as your base material. Do not put the faux leather material shiny side down. The shiny side needs to be facing upwards since the foil needs to go on top of the shiny side. Notice how Cricut Design Space will remind you which foil tip to use for your project. Remember that for this project, you will need two different tips, the fine and the bold tip.

4. Load your foil transfer tool in CLAMP B and then load your mat to your Cricut machine to start cutting!


5. Once your Cricut machine is done foiling with the fine tip, you will see this notice on your screen. It'll ask you to switch the tip to the bold tip as well as removing the used gold foil. Since I am using the gold foil transfer sheet again, I did not remove the gold foil from the faux leather. The only thing I did for this step was switching the tips from fine to bold. In order to remove the fine tip from the housing, you will need to click on the plunger and insert the bold tip.

6. It's time to remove the gold foil transfer sheet before the Fine-Point Blade starts cutting through the faux leather. Then, you will load the Fine-Point Blade in Clamp B to cut the faux leather.


7. All done! I made a little hole at the top of the bookmark to add a tassle! Completely optional.


I also used the Cricut foil transfer tool on some earrings! I think it turned out super cute and chic! Check out the video below for a close look on how I used the foil transfer tool on faux leather earrings!
What will you be making with the new Cricut Foil Transfer Tool? Share with me in the comments below!


My name is Gayla Gerrard , I just bought the Cricut maker 3 machine , and want to a foil transfer sheet or foil iron on on cards & shirt, but my machine in the design space says it’s not compatible with the foil, in the material settings. I can’t find a way to change that in the browse all material Part of the design space ? Could you help me out asap? my email is gaylagerrard0519@gmail.com
or txt me at 801-837-8959!