
Cricut's Newest Offset Feature on Design Space
- Cristina de la Cruz

- Mar 18, 2021
- 3 min read
Cricut just released one of the coolest features on Design Space. I think it's safe to say that a majority of us Cricut lovers have been waiting for this feature for the longest time! Please do remember that this is still in the beta phase so things still might change.
The newest feature is offset and I want to show you how to add it to your images. You can definitely use this for texts as well but I will be showing you on an image. Also, these SVG's I purchased from this SUPER TALENTED creator Erica, you can find her designs here.
PLEASE REMEMBER OFFSET IS FOR DESKTOP USE ONLY. I am not sure if Cricut will be adding this feature on the app but let's hope so!

WHAT IS OFFSET?
Offset allows you to add a shadow to your design, text or phrase. You can add more than one offset to your selected design. This is perfect for those who love to make stickers and those crafters that make cake toppers.
Where can I find the "offset" feature?
Offset is in between the "Edit" and "Align" button. There are three options within the "offset" selection: Distance, Corner, and Weld Offsets. Let's take a look at all of our options.
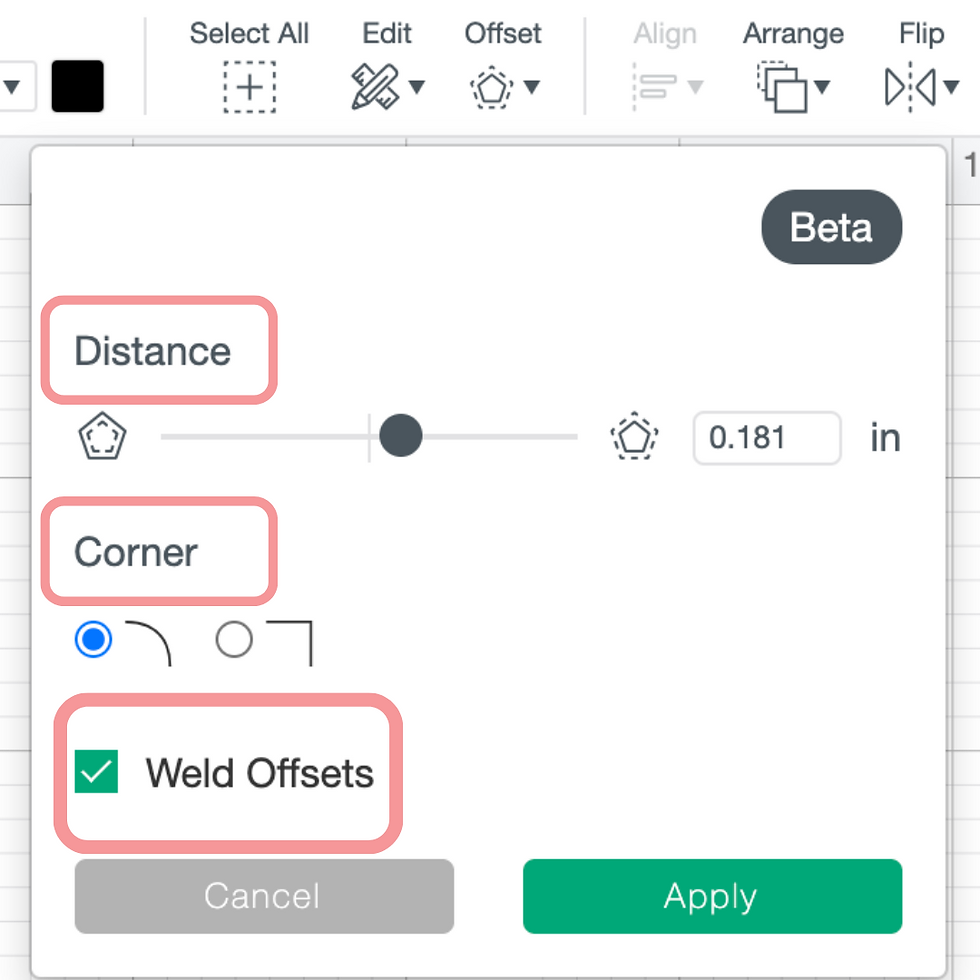
DISTANCE:
This is where you can slide the black circle for the desired thickness of offset. You can see there is a white rectangular box in which you can enter your desired thickness. The thickness is measured in inches.

CORNER:
You can decide whether you would like a round or a square corner. The design that I am using shows no difference in the selection of "corner". I wanted to show you the difference between the round and square corner so I used each selection with a text phrase. There is not much of a difference but you can see for yourself. Remember this is still in the beta phase so I am sure more improvements will be made along the way.

WELD OFFSETS:
You can click for your design or text to be welded into one single design or you can make an offset for each set of your designs. You can see the difference below - as you can see in the arrow presented - I did not select to weld the design therefore it made two separate offsets.

HOW CAN I USE THE OFFSET FEATURE?
I am going to show you step-by-step how you can add "Offset" to your design. Now that you know where you can find "Offset" and its' three options, let's get started!
Step One:
Click on "Upload" to find your image. Then click on "Insert Images".

Step Two:
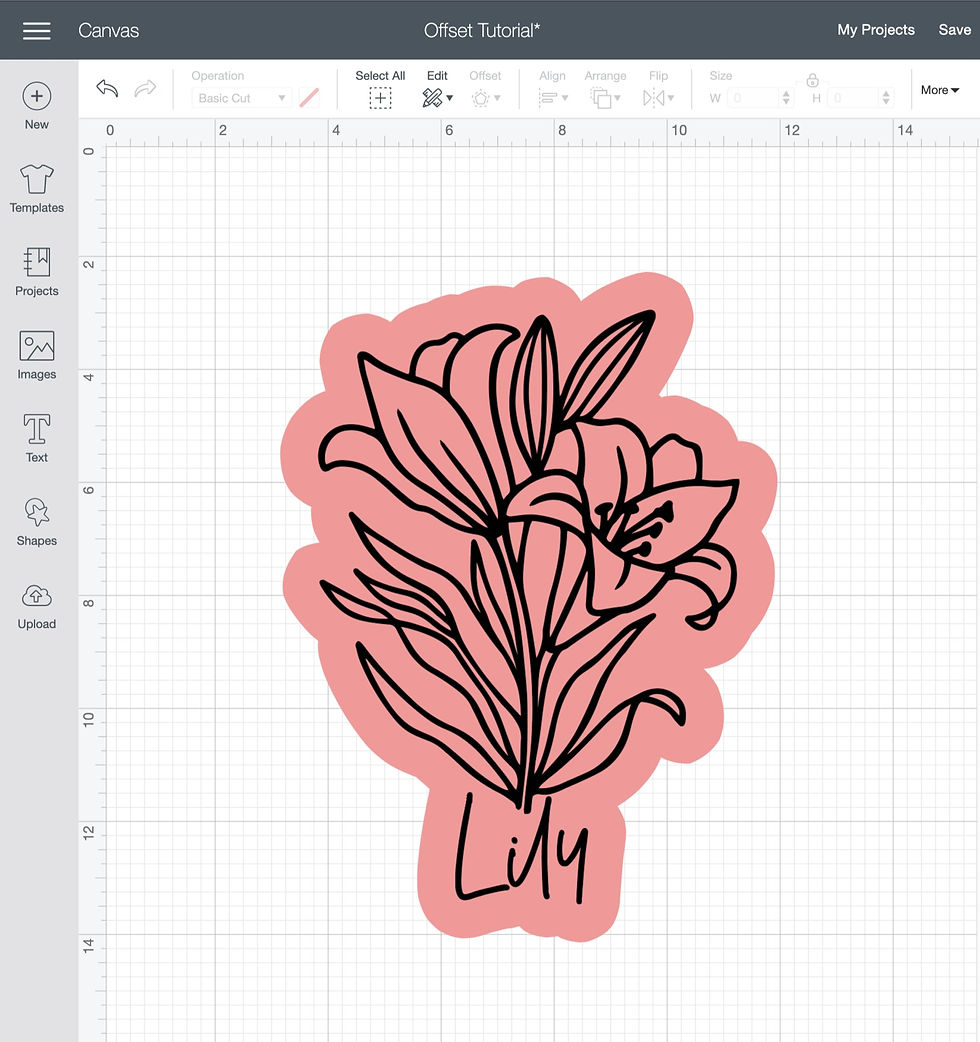
Click on "Offset" then slide the black circle to the right to select the thickness of your shadow/outline. Remember the measurement is in inches. Then, select whether you want a round or square corner. Next, select weld offsets so your design is one complete design. Unless you want two separate offsets for your one design. Finally, click on Apply.

Step Three:
The "Offset" is complete. I did change the colors and you can do that too! As you can see, there is a small negative space on the offset image. If you end up with a lot of negative spaces from your offset design, you can remove them. I'll show you how on step four.

Step Four (optional):
Click on "Contour" to remove the negative space left on the offset design. You can find the "Contour" button in the bottom right-hand corner.

Remove negative spaces by selecting the portion that you do not want on your "Offset" design.

Step Five:
Finally, all done! Now you know how to add the "Offset" feature on your designs!

If you have any questions regarding the newest addition to Cricut Design Space, comment below! I am here to answer your questions.
Stay Crafty,
Cristina


Hi!! Omg thank you so much for sharing!! question what setting do you put on your for cutting ??